Showing posts with label grunge paper. Show all posts

30 Apr 2014

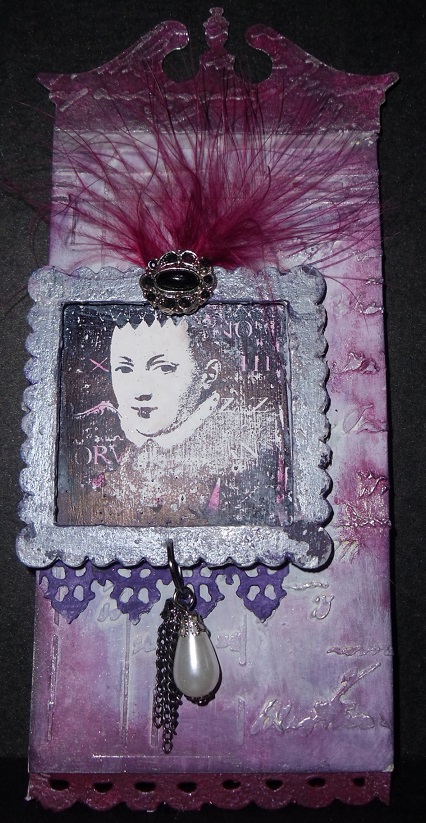
April Tag

This is the first time I have entered the Tim Holtz 12 tags..but after seeing the board my lovely friend Kirsten did...I thought I'm going to have a go at this!! I absolutely love the new frameworks dies and knew I'd be buying them the minute I saw them on the CHA previews!! You can pop over and see Kirstens here. So off I went to Tim's blog..and wow what a lovely tag!! You can see it here.
Seeing as I was short on time (what's new) I followed along with what Tim did. I don't have the pine cone die so used my mini tattered flowers and leaves instead.


I Absoloutely loved doing this tag and it gave me a chance to use one of my frameworks!! Just have to wait for the rest of the great new releases to hit the UK!!..

Thanks for stopping by.......

3 Dec 2013

Sculptered Book

I have been seeing these books in blog land and also on you tube..they are also called book art or origami book art....you should check them out as some of them are amazing!! So I thought I would like to have a go.

I used an old Dickens book which had nicely discolored pages and set about folding them back on each other into the centre. You don't have to glue them they will stay in place. I then very lightly inked the edges with some walnut stain distress ink.

Next I chose some paper to line the insides...I believe it is my minds eye from a Christmas stack. I distressed the edges and inked them and stuck them in leaving the edges curled slightly.


On to decorating..I used some lovely green velvet ribbon to hold the book at the angle I wanted it to sit. I coloured some lace with watered down green olives fresco and stuck that onto the edges of the pages.


From a selection of movers and shapers dies I cut three reindeer and the number 25.I painted the reindeer with a combination of brown frecos and the 25 with claret and london bus.


I then used antiquities from ranger to give them a slight frosted look. I stamped the holly leaves onto some christmas paper, heat embossed them and cut them out. These were shaped and placed onto the book with silicone glue and some pearl beads coloured with red pepper alcohol ink were placed in the middle.The reindeer were stuck in.


I found the poem 'Twas the night before Christmas' online and printed it out onto parchment in as small a font as I could. I distressed it and concertina folded it into a little book I had made from grey board and grunge paper. This had a filgree wrap cut in half with a metal bead spacer as a closure with some wired thread.


This was stuck securely on the bottom of the book.


I had bought some really cute wooden tags and stars from Ally Pally in September and thought they would finish it off. I stamped joy with crimson archival onto the tag and put some red wire through the top.
The stars had the antiquities on them and were put along the bottom of the book


                               So here it is finished........


  Thanks for stopping by.........

*What I didn't write in this post at the time was that the book was going to my sister in the USA!! I posted it off on the 14th December..paid a whole lot more to have it delivered in 4 days and did it arrive?? NO!! It finally arrived on boxing day..which happens to be her birthday and I was talking to her on Skype when the postie knocked on the door...so saw her open it too which was nice :D she loved it!! so all went well in the end and she has something I made out of something that belonged to our beautiful mum to bring out every Christmas!!! Hope you have all had a lovely Christmas and a happy new year to you all xxx*


1 Sept 2013

Chalkboard

Well it's Darcy's last week as GD over on the paper artsy blog and what a week it was!!! Her first project of the week was a lovely chalkboard...you can pop over and see it here. I loved the project and thought I definitely wanted to have a go..also want to have a go at all the lovely projects she rustled up this week..the patchwork paper here...and the fabric book is to die for..but need to find some jeans to cut up!!! you can see it here..well you should just go over and see all of it from here because she even designed some gorgeous stamps!!!


For my chalkboard I used a bingo clipboard which I had picked up ages ago in one of those pound shops.. I painted it all over in little black dress, Then I coloured some grunge paste with guacamole and stenciled the leaves up the side. I then painted in some hey pesto and green olives.

After seeing Darcy's new stamps it gave me an idea what to put on the leaves as I didn't really want flowers because the board is a bit small. I bought some great molds at Stevenage earlier this month and one of them has a cute little heart..so I made some light weight paper clay hearts and painted them with claret and london bus frescos..they were stuck on along the vine. I made a banner with some calico and painted it with haystack. This was all assembled onto the board and little paper clay bumble bee.
I made a loop from grunge paper to hold the chalk...and done.


I would like to thank Darcy for sharing her fabulous projects with us with such great step by step instructions

thanks for stopping by....

10 Aug 2013

A couple of bookmarks

Well I have had a very enjoyable day spent mostly in my shed just playing around doing this and that.
Two of the things I made were these two book marks inspired by Sue Harrington over on the Paper Artsy blog, you pop over and see how Sue did it here.
So here are my book marks..they are a lot of fun to do..


The first one I used distress inks to colour the grunge paper, old paper,bundled sage and peeled paint.
The image came from LP010, the swirls from HP1005 and the script is mini 61..all Paper Artsy stamps.
I finished off by cutting the fringe at the bottom and edging it with balck archival to draw the eye in...


The second one was painted using Stone.Irish cream and Cinnamon frescos..just blending them until I was happy with it. I used the same stamps as the green one but instead of a fringe I shaped the bottom using an on the edge die. I used black archival for the edge and the lighly brushed ruby treasure gold over the black..

they were quick and easy to make so thank you Sue for the inspiration!!


Thanks for stopping by...


11 Jul 2013

Hand made book

France Papillon was back this week over on the Paper Artsy blog. Her first project  was a lovely little Art Journal Book...you can pop over and see it here. Well I do love hand made books so knew I would definately have to have a go at this.

I didn't have a canvas to hand so used a small wooden frame and covered it with sticky back canvas, and painted it  in honey dew. I cut a back cover in grey board and because of the different frame had to cut 2 smaller doors. All of it was painted in honey dew and when dry had a thin coat of crackle glaze. Next was a coat of London night and when that was dried I rubbed away some more of the top coat with a baby wipe Darcy style. then sanded it to rough it up a bit more.


I used grunge paper for the hinges which were embossed and a little metal fastener on the door closure. This was painted honey dew and a tiny bit of onyxite treasure gold.


I followed a video on U-Tube to do the coptic binding and it wasn't as hard as I thought it would be


On the inside I stamped and painted an image from Eclectic plate 6 and painted it..used a rub on and glued it to the inside of the cover. I used a TH rub on just over the image.


After putting the book together I added some Royal amethyst TG randomly around the edges. Here is the end result!!
I enjoyed this project and will definitely use the binding method again!!

Thanks for stopping by....

23 Jun 2013

Little Book of Tags

Over on the Paper Artsy blog this week it was Carol's turn again to wow us with her projects..One of them was a gorgeous tag book with tags to go inside. You can pop over and see how she did it here and here...beautiful. I followed Carols instructions on the book and also my first tag as I love that stamp!!

This post will be mainly pictures of what I have done..it is a work in progress as I still have 3 tags to complete...I didn't have the size 10 tags so had to use 8 and adapt the size of the book..

The first tag is more or less the same as Carol's..I loved her lay out and the stamps she used..


 The second tag is my favorite so far.


I stamped the image with less ink than usual so that looked old and worn.

                     And here is the little book they will all live in...


                                                   The Front


                                                The Back
                                           

                                                   The Spine


                                                    The inside


I do apologize for the poor pictures of the book but I just couldn't get any really good ones..

I would like to say thank you to Carol for some great projects this week!!

Thanks for stopping by...


16 Jun 2013

It's Father Day!

Happy Fathers Day to all the dad's out there...hope you all have a great day.

As you probably know some of the PATWITS and I did an up cycling challenge last week and one of the items was a small cigar tin...and I mean small about 8cm x 7.5. Emma decorated her tin for her dad as a gift and I thought what a great idea...so I'm borrowing it Emma with your permission of course as I really can't get into making cards at the minute. You can see Emma's here.


I base painted it black after sanding it..then put a thin layer of crackle glaze over that, When that was dry I added a coat of stone fresco. I also painted the inside black and added old book pages which had been dragged through a puddle of walnut stain distress ink.
The stamp on the front is from the paper boy set by Artistic Outpost colured with distress and promarkers.


I cut the June calender out of the lost and found paper stash and roughed up the edges and inked it with distress..attached a tiny paper clip and stuck it in the tin. I die cut a small movers and shapers fob watch and painted it with white fire TG then added some black paint..sprocket gears and watch hands in the middle. attached some chain and a small toggle and stuck that down as well. Also stamped dad and covered the letters with some epoxy stickers.
On the other side of the tin I repeated the process with the book page then die cut a memory box label die with grunge paper and painted it in stone, I cut a photo of my mum and I taken many years ago on a family holiday put string in the top and slipped it behind the label. I added 3 washers with brads down the side. Lastly I added white fire TG around the edges.
I'm sure my dad will like it far more than a card so thanks for the inspiration Emma!!

thanks for stopping by...