Showing posts with label treasure gold. Show all posts

19 Jan 2014

Inspiration from Julie Ann Lee

Over on the paper artsy blog this week we welcomed our friend and fellow #patwit Julie Anne Lee. I love her oldy worldy vintage kind of crafting and she didn't let us down with her first project 'a casket'. Pop over here and have a looksie...it's gorgeous.

I had a little box I had got from Leandra at Ally Pally in september to put some embellishments in...but it was too small (or I have too many embellishments!! I more or less followed along with what Julie Ann did so won't go into a step by step..

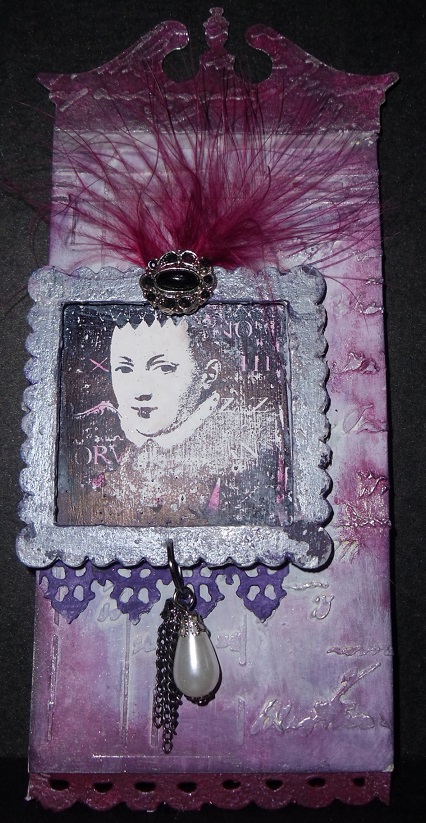
So here we are.......first up the lid....I used a mixture of blush,haystack,egg plant and claret frescos. I added florentine and brass treasure gold to the finished piece.


This is the inside of the lid...


The bottom of the box....


And all of it together......

We had some good inspiration this week from Julis Ann so thank you!

Thanks for stopping by..............................................

5 Jan 2014

Paper Artsy Christmas Cracker

Hello lovely blog followers!! hope you all had a wonderful Christmas, and that you all have your Christmas trees and decs down by today..and that means you Leandra lol!!

Leandra did 3 lovely pieces on her blog in the last few days and for each challenge there is a prize of some A5 brand spanking new 2014 stamps and some limited edition paints..well if that's not a good enough reason to enter I don't know what is!!

Video 3 was called painted clusters..a Finn style piece with fresco paints..my favorite!! Didn't have time to do all three so chose this challenge.... I absolutely love this technique so pop over and have a look here.

I followed along with what Leandra did so won't bore you with all the details you should go over and watch the video,step by step I am so glad I bought some heavy duty gel medium though as it makes it so much easier to get everything to stick.

                   I didn't take a piccie before I painted the first layer


This is the finished piece using honey dew,guacamole,sage,crushed olives and holly frescos and olive bronze and brass treasure gold.


I'd like to wish you all a very happy new year!!
thanks for stopping by..........

27 Oct 2013

Halloween..a challenge by Liz Borer

This week over on the Paper Artsy blog we have Liz Borer showing us some amazing projects. This one was inspired by Liz here. I don't have any Halloween stamps so had to go with what I had...

I couldn't find my new tub of grunge paste (found it now phew) so I used puff paint to write trick and treat on a piece of an old box. Most of what I did I followed along with Liz..using haystack..smoked paprika..claret and eggplant frescos. I stenciled some branches with my newly found grunge paste.

I cut the cat and raven from my movers and shapers die in black card and coated them with gloss glaze. the witches face is a Lynn Perella stamp from LP008 stamped onto crackly tissue and put onto a paper artsy paper head and cut to size..I made the hat and painted it black and added some glitter. I also used the bat wings from Eclectic 6. and jewels for the body. I stamped some script randomly and stuck everything down Lastly I went over the lettering with white fire TG and here it is...

Thanks for stopping by.....

6 Oct 2013

Inspired by Jo Myhill

This week over on the Paper Artsy blog we have had some lovely projects from Jo, one of the new GD over on the blog. She has done some lovely projects, you really should pop over and see them here. I absolutely loved all three projects but had hardly any spare time this week.

Last weekend a group of #patwits and myself had a great weekend of classes with the very talented Lin Brown....but that's another blog post..watch this space lol! Sam Emma and I went into the local garden center to get some flowers and came across some very inexpensive little wooden boxes. Wow great for bellies we thought so seeing as they only had three there we got one each. So here is mine inspired by Jo...


I started by painting the whole box in snowflake frescos...at first it was painted in all shades of browns and black but I didn't like the end result.Jo suggested I paint it all in concrete and start again..which I did.
I stenciled the diamond pattern randomly all over the box using grunge paste and let that dry. I then stamped mini 96 with embossing ink and used utee to emboss. I then gave the whole box a coat of lake Wanaka..dried that and just started dry brushing with Antarctica and honey dew. I do love the texture of the embossing along with the grunge paste so thanks for that Jo..I finished off with some treasure gold around the edges and slightly over the embossing.I just wish we had been able to get more boxes..All I need to do now is fill it with bellies!!

25 Aug 2013

Fabric Tag

As you know it's been Carol's last week on the paper artsy blog. On day three she did a beautiful fabric hanging and some tags, you can pop over and see them here, it is well worth having a look.
So I thought I would play around with some fabric and my baby sewing machine and have a go at a tag....well I am not sure I really like how it turned out....think I will probably have another go at some stage but here it is...


I didn't have any canvas so used a piece of calico and painted it in various fresco paints..smoked paprika,london bus,autumn fire,zesty zing and claret. Using mini no61 I stamped randomly all over the tag.I then sandwiched it between some wadding and smooth cotton fabric and stiched them all together.
I stamped the lady using black archival onto a smooth cotton fabric and heat set it. Painted her in frescos. I frayed the edges before painting..and then stitched her to the tag.
I made the embellishments with my new molds using paper clay and painted them all black. I then brushed on some copper and florentine treasure gold. I also added some treasure gold around the edges of the tag. Added some tape and lace to the bottom and it was done.

Thanks for stopping by.....

18 Aug 2013

Just slap it on!!

This week on the Paper Artsy blog one of the special birthday guests was the very talented Michelle Webb. She did an absolutely stunning piece..you can pop over and see it here. I didn't have a plywood frame or the gorgeous Jofy stamps she used so had to do my own version. I did however just slap it all on in the nicest possible way of course!! and here it is...


I followed along with what Michelle did...well after a fashion with the just slap it on technique.. I didn't like the way my crackle turned out down the side so sanded it all back to distress it as much as possible. When I was happy with the background I added the stamps from Jofy10 and painted them with fresco paints. I then stenciled on the grass and bird cages and painted them. I roughly went over the stamps with a black pen to bring them to the front again..The branches and birds were also painted in with fresco and the cages just had a light rub with white fire and pewter treasure gold. I went around the edge very lightly with onyxite treasure gold.

10 Aug 2013

A couple of bookmarks

Well I have had a very enjoyable day spent mostly in my shed just playing around doing this and that.
Two of the things I made were these two book marks inspired by Sue Harrington over on the Paper Artsy blog, you pop over and see how Sue did it here.
So here are my book marks..they are a lot of fun to do..


The first one I used distress inks to colour the grunge paper, old paper,bundled sage and peeled paint.
The image came from LP010, the swirls from HP1005 and the script is mini 61..all Paper Artsy stamps.
I finished off by cutting the fringe at the bottom and edging it with balck archival to draw the eye in...


The second one was painted using Stone.Irish cream and Cinnamon frescos..just blending them until I was happy with it. I used the same stamps as the green one but instead of a fringe I shaped the bottom using an on the edge die. I used black archival for the edge and the lighly brushed ruby treasure gold over the black..

they were quick and easy to make so thank you Sue for the inspiration!!


Thanks for stopping by...


25 Jul 2013

Best way to spend a Saturday

Had a lovely time on Saturday in a class with Lin Brown and a few lovely crafty ladies. We did a large Canvas..think it's A3. It's been papered, painted and inked and all sorts of lovely goodness stuck on. I can't remember who makes the arch kit but I think Lin said 7 gypsies.

Lin's one is here She got lots of request to do this as a class which got very over subscribed!! So much so she had to lay on extra dates!!!
I didn't get to finish mine in the class...now there's a surprise so got a chance yesterday to finish it off and after lots of flaffing around finished!! Not sure if there it too much on it now but I am not taking it off lol!
So here are some pictures of the finished piece!!


The pictures aren't that good but have tried to take close ups of different bits...


 Such an enjoyable class..there were times when you could have heard a pin drop!!!


                                     Thanks for dropping by.....

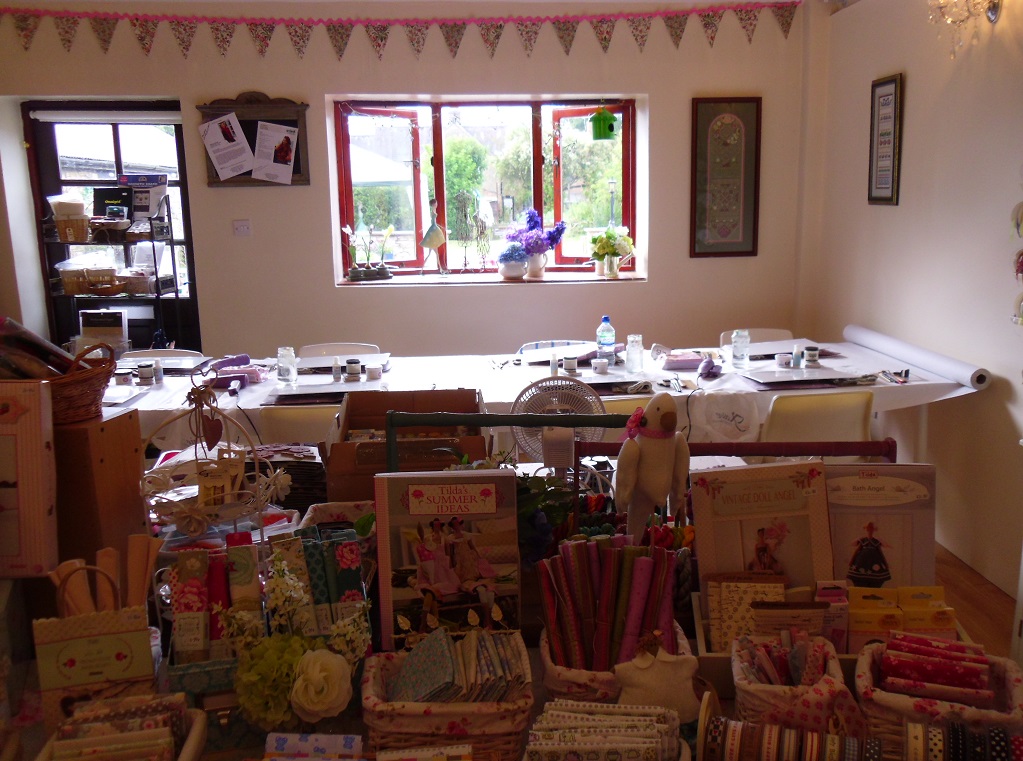
Thought I would add some more photos from our day..these are snippets of the Bead Scene where the lovely Steph hosts our classes with Lin...


                              Here's Lin sorting out all the goodies                                                  


                   This table is full of goodies and is in the same room we were in...

                    Some of the lovely ribbon and lace that Steph sells...


This is the table where all the fun goes on...you should have seen it a bit later on lol!!

This is a picture out in the main part of the shop...it really is a lovely place ...if you are close enough you really should pop in!!

23 Jun 2013

Little Book of Tags

Over on the Paper Artsy blog this week it was Carol's turn again to wow us with her projects..One of them was a gorgeous tag book with tags to go inside. You can pop over and see how she did it here and here...beautiful. I followed Carols instructions on the book and also my first tag as I love that stamp!!

This post will be mainly pictures of what I have done..it is a work in progress as I still have 3 tags to complete...I didn't have the size 10 tags so had to use 8 and adapt the size of the book..

The first tag is more or less the same as Carol's..I loved her lay out and the stamps she used..


 The second tag is my favorite so far.


I stamped the image with less ink than usual so that looked old and worn.

                     And here is the little book they will all live in...


                                                   The Front


                                                The Back
                                           

                                                   The Spine


                                                    The inside


I do apologize for the poor pictures of the book but I just couldn't get any really good ones..

I would like to say thank you to Carol for some great projects this week!!

Thanks for stopping by...


25 May 2013

Oriental tag with Carol

Carols second piece on the paper artsy blog was a beautiful oriental tag. You can pop over and see how she did it here.


Here is my version I didn't have a size 10 tag so had to use a size 8..so because of this I decided to go for a smaller stamp..

I used eggplant,pansy,mushroom(the original one),moonlight,vanilla and honeydew frescos for the back ground. I stamped and painted the Lynne Perella image and cut it out, put it on tag using foam pads.

The writing is also from a Lynne Perella stamp as is the little coin thingy... I didn't have gold utee so used dusty concord distress and embossed it with clear. Couldn't get the same effect as Carol.

I used the small scallops on the edge die and some purple ribbon for the bottom of the tag, and coloured some seam binding using distress stains.


Lastly I used olive bronze treasure gold lightly over the embossed parts of the tag...

thanks for stopping by.....

17 May 2013

Day One with France Papillon

I know I have done this weeks projects in the wrong order but I really wanted to make one of the spools as I had time before work and they are such fun to make. So my second project this week is my version of Frances' Intimate Journal..you can see how she did it here...


 I followed Frances' instructions with the crunchy wax paper and fresco paints. I then added some grunge paste around the edges to give a bit more texture.. I added more paint with cut n dry..beach hut and hey pesto and a bit of french roast around the edges..


I watered down some french roast and coloured a piece of burlap to put down the side to hide the binding rings.. I also coloured a piece of lace adding some hey pesto. This was stuck on down the side of the book along with some leafy trim.


I cut some mini gears from a Tim Holtz die and embossed them with distress. Added some metal washers and fasteners.
I used some Sarah Naumann stamps for the title which was stamped on smoothy card and torn around the edges then sewn onto some crackly tissue..and there you have it...
Thanks for stopping by....


12 May 2013

Paper Artsy Day 3 with Sue Carrimgton

On day 3 Sue did a beautiful hanging board and called it Art in Bloom..I loved the colours she used so chose to use the same...you can see Sue's piece here


I had used the chunky hanging board on my last piece so went for a 5x7in canvas.. I followed Sue's instructions for the background.I wanted a softer flower so stamped some of Lin browns designs and cut some tattered flowers from some soft mulberry paper. I stamped the biggest flower from ELB01 straight onto the canvas using Sepia Archival. Just layered them up and added a flower brad in the middle.

I used a piece of cotton used in curtain trimming for the stalk and cut some leaves from the same set of stamps as the flowers. Stamped a small script stamp in sepia randomly over the canvas...I rubbed a small amount of treasure gold in Spanish topaz around the edge.

Thanks for stopping by..